WinSCP Tutorial
This is a short guide for using WinSCP for transferring files to/from General Use (genuse) Linux servers.
WinSCP is an SCP client (Secure Copy) for windows. WinSCP can be downloaded at the WinSCP Official Site.
Please Note: All Genuse servers have been upgraded to a new operating system with a revised security policy. They are only accessible from on-campus or via VPN connections. Direct connections from the Internet are no longer available.
Login to genuse server using WinSCP
- Launch WinSCP
- Enter Host name.
The Host Name can be any General Use Linux Machines. Just add the domain '.smu.edu' the machine name.
For example:genuse50.smu.edu - Enter username
- Optionally enter password (or enter in later prompt)
- Select Login button
- The first time you connect with WinSCP to a server, you will see a "Host Key Warning" dialog box
- Select Yes to add the host key.
- You may be prompted for password here (if not entered on login screen)
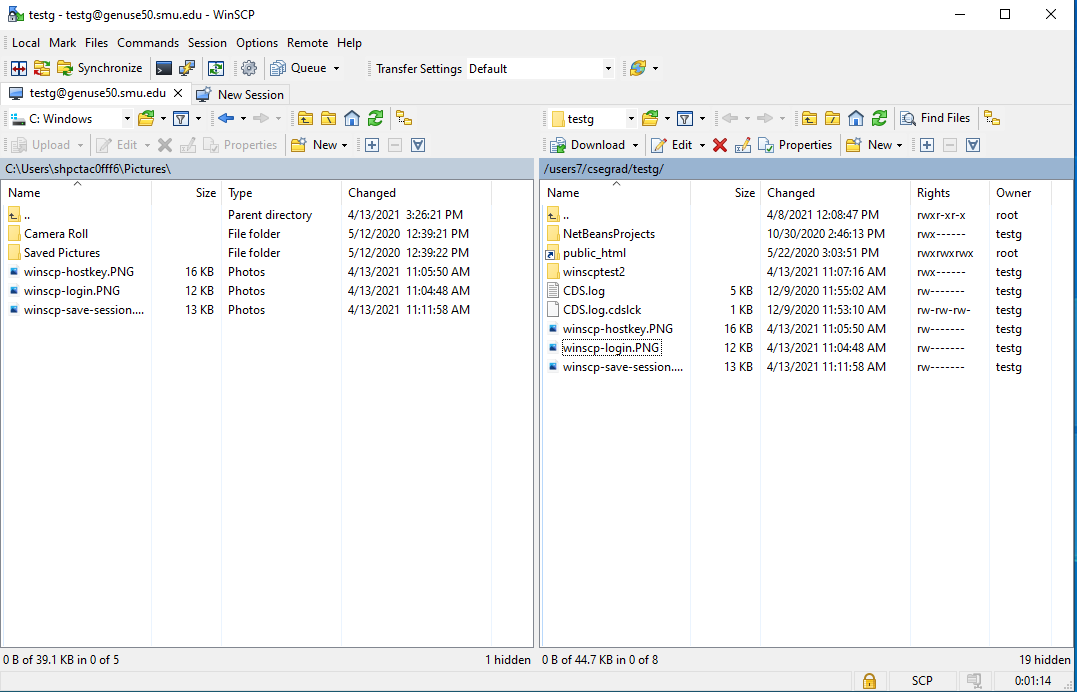
The main winscp command windows will appear

Uploading and Downloading
The left part of the screen is the local computer. The right part is the remote host.
To upload to the remote host:
- Select file(s) in the left window(local computer)
- Drag to the right window(remote host).
To download from the remote host:
- Select file(s) on the right window(remote host)
- Drag to the left window (local computer).
Create New Folders
- To create a new remote folder, click anywhere in the remote window and press F7
- To create a new local folder, click anywhere in the local window and press F7
For more information, select Help from the top bar menu.